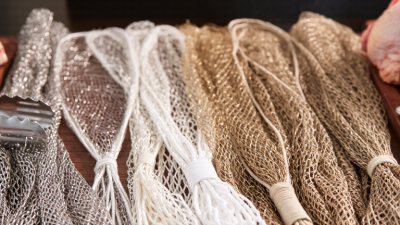
How to Use Cooking Meat Netting?
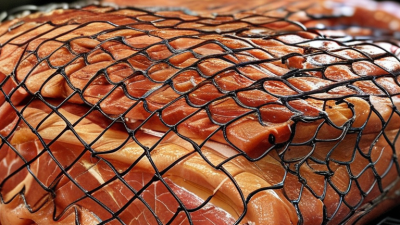
Cooking meat netting helps a roast keep its shape while it cooks. It is commonly used for rolled pork, stuffed chicken, and boneless joints that might loosen in the oven. A snug, even mesh supports a more uniform shape, making the roast easier to turn, carve, and serve. Small detail, big difference.
Before using cooking meat netting, check that its label identifies it as suitable for cooking and follow the package directions. Materials and heat limits can vary. Pat the meat dry, tuck loose edges or filling inside, then slide the mesh over the roast without pulling so tightly that it cuts into the surface. If the netting comes on a tube, gently feed the meat through; if it is a sleeve, secure its ends as directed. Wash hands and tools after handling raw meat. Cook according to a trusted recipe, and check doneness with a food thermometer in the thickest part, away from bone and netting. Not by color alone.
After cooking, let the roast rest as the recipe advises. Cut the mesh carefully with clean kitchen scissors and peel it away before carving. Some netting is designed to stay on during cooking, while other products may have different instructions. It can be fiddly. Check the label rather than guessing, especially when the netting’s material or intended use is unclear.
What Cooking Meat Netting Is and What It Does
Cooking meat netting is a heat-resistant, food-grade mesh that holds a roast together while it cooks. It is commonly used around rolled pork, stuffed poultry, and boneless joints. The mesh keeps loose edges tucked in, so the roast is easier to turn and slice. It can also help herbs or filling stay in place.
It does not seal in juices or make meat cook faster. Think of it as a support, not a safety feature. One easy mistake is trusting the net’s appearance instead of checking the center.
USDA FSIS guidance gives safe minimum internal temperatures of 145°F with a three-minute rest for whole cuts of pork, beef, veal, and lamb; 160°F for ground meats; and 165°F for poultry.
Tip: Check the packaging to confirm the netting is intended for cooking, then follow its removal instructions. Some netting should stay on during roasting; other types should come off first. Use a clean food thermometer in the thickest part, away from bone or stuffing. Small detail, real difference.
If the roast shifts when you cut away the mesh, pause and steady it with tongs rather than pulling hard. I wouldn’t assume every mesh behaves the same.
USDA FSIS temperature guidance is available in its Safe Minimum Internal Temperature Chart.
How to Choose the Right Netting for Your Meat
Choose netting by the roast’s shape, weight, and cooking method. A compact pork loin needs a closer mesh than a broad, uneven turkey breast. Measure the meat at its widest point, then check the netting’s stated size and stretch range. It should hold the roast firmly without cutting into the surface. Fit matters.
Check the material and temperature rating before buying. Netting intended for oven use should be labeled for food contact and rated for your cooking temperature. Some products are designed to be removed before cooking, while others can stay on; never assume. Read the package instructions, especially if the netting contains elastic fibers. A net that looks similar may behave differently in heat.
Mesh spacing affects how the roast looks and holds its shape, not how quickly it cooks. Closer openings can leave deeper marks, while wider ones may suit larger cuts. It is easy to focus too much on getting a perfectly neat exterior. In practice, an overly tight net can compress soft meat and make removal awkward. Check the fit before cooking, and leave enough room for a knife to slide under one strand when the roast is ready to be unwrapped.
How to Choose Meat Netting: Safe Cooking Temperatures
Use food-safe, oven-safe netting that fits the roast securely, and follow its product instructions. Netting helps hold the meat’s shape; it does not change the safe minimum internal temperature.
For whole cuts of beef, pork, lamb, and veal, cook to 145°F and allow a 3-minute rest. Cook ground meats to 160°F and poultry to 165°F. Check the thickest part with a food thermometer.
How to Prepare the Meat and Netting
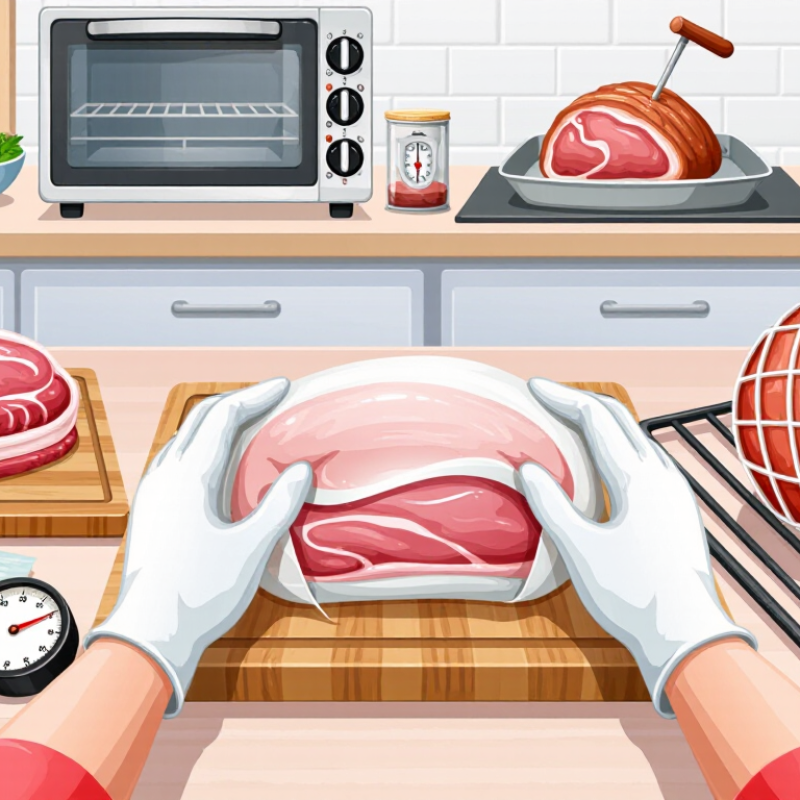
Before handling the meat, wash your hands and clear a clean work surface. Pat the roast dry with paper towels so it is easier to handle and season. Trim loose flaps that could fold unevenly, but leave a thin layer of fat if you want it to baste the surface. Season all sides, including the ends. Let the meat sit briefly while you inspect the netting. It should be clean, intact, and labeled for cooking; decorative or unknown netting may not be heat-safe. Check the package instructions, too.
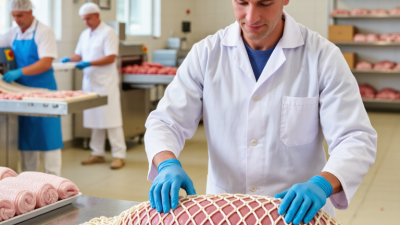
Lay the netting on a clean board and gently stretch it open without pulling hard. Slide the roast through, or position the netting around it, depending on its shape and construction. Keep the roast centered, with no large pockets of loose fabric. Snug is enough. If the netting cuts into the meat, loosen it; if it hangs slack, the roast may lose its shape during cooking. I sometimes find this part fussier than expected, especially with a tapered roast. Take your time. Wash any tools and surfaces that touched raw meat, and keep the prepared roast separate from ready-to-eat foods. When uncertain about the netting, use butcher’s twine instead.
How to Use Cooking Meat Netting? - How to Prepare the Meat and Netting
| Stage |
What to Do |
Practical Details |
Why It Matters |
| Choose suitable netting |
Use netting specifically labeled as food-grade and suitable for the intended cooking method. |
Check the product instructions for oven-temperature limits and whether the netting should stay on during cooking. |
Not all netting materials are designed for direct contact with food or exposure to cooking heat. |
| Prepare the meat |
Trim loose pieces and excess surface fat as desired. If making a rolled roast, place the filling evenly and roll the meat snugly. |
Keep the roll even in thickness where possible; this helps it cook more uniformly. |
A neat, compact shape is easier to net and less likely to unfold during handling. |
| Prepare the netting |
Cut netting only if the product instructions allow it, and leave enough extra length at both ends to secure the roast. |
Use clean scissors. Avoid stretching the netting beyond its intended fit. |
Adequate length helps keep the net in place without pulling the meat out of shape. |
| Fit the net over the meat |
Carefully slide the net over the roast, or position the meat on netting designed to be wrapped around it. |
Work slowly to avoid tearing the net or dislodging a filling. Follow the netting manufacturer's fitting method. |
Even placement supports the roast and helps it hold its shape as it cooks. |
| Check the fit |
Make sure the net is snug and evenly distributed, without deep constriction or large gaps. |
Reposition loose sections before cooking. Do not use damaged netting. |
A balanced fit helps secure the meat while allowing heat to reach it. |
| Cook safely |
Roast according to a reliable recipe and verify doneness with a food thermometer. |
Place the thermometer in the thickest part of the meat, avoiding bone. Follow the safe minimum internal temperature for the specific meat and cut. |
Cooking time varies with roast size, shape, and oven; a thermometer is more reliable than time alone. |
| Rest and remove netting |
Rest the roast as appropriate for the recipe, then remove the netting carefully if it is intended to be removed. |
Use clean utensils and watch for hot juices. If the product instructions say to remove the net before cooking, follow those instructions instead. |
Resting helps the meat remain juicy when sliced, and following the netting instructions prevents unsafe use. |
How to Fit and Secure Netting Around Meat
Choose food-safe netting rated for the cooking method, and keep the meat chilled while you work. Pat the surface dry so the netting grips instead of sliding. For a small roast, stretch the netting over a clean netting tool or wide cylinder, then ease the meat through slowly. Leave a little room at both ends. The mesh should sit evenly, not cut deep grooves into the meat.
Tips: Tie each end with kitchen twine, or secure it according to the netting instructions. Check for loose loops and gaps, especially around tapered ends. If the roast bulges through the mesh, loosen it and reposition the netting; forcing it tighter can distort the shape. A slightly uneven first attempt is common. Pause and adjust rather than pulling harder.
Before cooking, confirm the netting is suitable for the oven or other cooking method. Keep it away from direct flames unless its instructions explicitly allow that use. Place the roast seam-side down if possible, and turn it carefully with tongs to avoid snagging the mesh. Follow a reliable recipe for cooking time and doneness, since netting helps hold shape but does not tell you when meat is safely cooked. Remove the netting carefully after cooking, once the roast has rested enough to handle.
How to Cook the Meat and Remove the Netting Safely
How to Use Cooking Meat Netting?
How to Cook the Meat and Remove the Netting Safely
Check the netting’s packaging before cooking. Some types are designed for oven use, while others should be removed first. Never assume netting is heat-safe just because it surrounds a roast. If instructions are missing, contact the seller or remove it before cooking, then tie the meat with kitchen twine if needed. Place the roast in a pan with the seam facing down. Keep raw-meat utensils and surfaces separate from cooked food.
Cook according to the meat’s type and size, and check the thickest part with a food thermometer. Avoid touching bone. For example, poultry should reach 165°F (74°C); whole cuts of pork or beef should reach 145°F (63°C), followed by a three-minute rest. Let the roast rest before removing the netting. It will be hot, and the juices need time to settle. Use clean tongs to steady the meat, then snip the netting carefully with kitchen shears. Cut away from your fingers and the roast. I can see why people rush this step, but that is when hot juices spill or the meat loses its shape.
Tips: If the netting sticks, pause and loosen it gently rather than pulling hard. Check for small strands left on the surface before slicing. A little patience helps.